Steam radiators are important elements for our house especially in the cold weather. But after a long time of use, it will go out of work, causing leaks of the valve. So you need to know some basic knowledge about replacing a leaking steam radiator valve. Below are the tips for you.
More Instructions
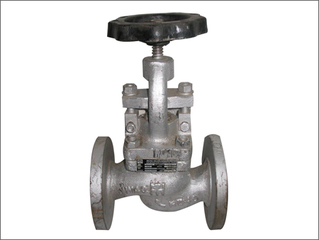
1), Turn off the thermostat and allow the system to cool. Close the intake valve on the leaking radiator by turning the handle in a counterclockwise direction.
2), Remove the screw on top of the valve handle with a screwdriver; lift the handle off the valve assembly. Locate the packing nut at the bottom of the valve stem. Loosen the nut with a crescent wrench, turning counterclockwise. Remove the packing nut from the stem. Remove the old gasket and any other debris from inside the nut with the needle-nose pliers.
3), Wrap 3 to 4 inches of graphite valve packing loosely around the valve stem in a clockwise direction. Do not stretch or break it.
4), Replace the packing nut and tighten it by using the crescent wrench in a clockwise direction. When the nut is tight, it will compress the graphite packing into a new gasket. Replace the handle and the screw. Turn the handle in a clockwise direction to open the valve.
5), Turn on the thermostat to check if there is leaks.
Since you've got the basic knowledge about tips on replacing a leaking steam radiator valve, next time you can solve the problem on your own.
More Instructions
1), Turn off the thermostat and allow the system to cool. Close the intake valve on the leaking radiator by turning the handle in a counterclockwise direction.
2), Remove the screw on top of the valve handle with a screwdriver; lift the handle off the valve assembly. Locate the packing nut at the bottom of the valve stem. Loosen the nut with a crescent wrench, turning counterclockwise. Remove the packing nut from the stem. Remove the old gasket and any other debris from inside the nut with the needle-nose pliers.
3), Wrap 3 to 4 inches of graphite valve packing loosely around the valve stem in a clockwise direction. Do not stretch or break it.
4), Replace the packing nut and tighten it by using the crescent wrench in a clockwise direction. When the nut is tight, it will compress the graphite packing into a new gasket. Replace the handle and the screw. Turn the handle in a clockwise direction to open the valve.
5), Turn on the thermostat to check if there is leaks.
Since you've got the basic knowledge about tips on replacing a leaking steam radiator valve, next time you can solve the problem on your own.
 RSS Feed